Accessing the Delphix Engine Console in AWS (KBA7306)
KBA
KBA# 7306Applicable Delphix Versions
- Click here to view the versions of the Delphix engine to which this article applies
-
Major Release All Sub Releases 6.0 6.0.2.0, 6.0.2.1, 6.0.3.0, 6.0.3.1, 6.0.4.0, 6.0.4.1, 6.0.4.2, 6.0.5.0, 6.0.6.0, 6.0.6.1, 6.0.7.0
How to Enable and Access the Serial Console for an Engine Running in AWS EC2
This document provides steps to access the serial console for a Delphix engine running in AWS EC2 in order to troubleshoot situations where network access to the VM is not possible, such as during boot or when network initialization has failed.
Prerequisites
The Delphix engine VM must be running on an AWS instance type that uses the Amazon Nitro (KVM-based) hypervisor. The EC2 Serial Console facility is not available for instance types running on the older Xen-based hypervisor. Details of the AWS instance types can be found at https://aws.amazon.com/ec2/instance-types/, including which run on the Nitro hypervisor.
Only Delphix engine versions 6.0.2.0 and later support instance types using the Nitro hypervisor.
The list of instance types supported by Delphix is available at https://docs.delphix.com/docs/deployment/deployment-for-aws-ec2.
Enabling EC2 Serial Console access
Before the serial console of an instance can be accessed, the EC2 Serial Console feature must first be enabled within your AWS account.
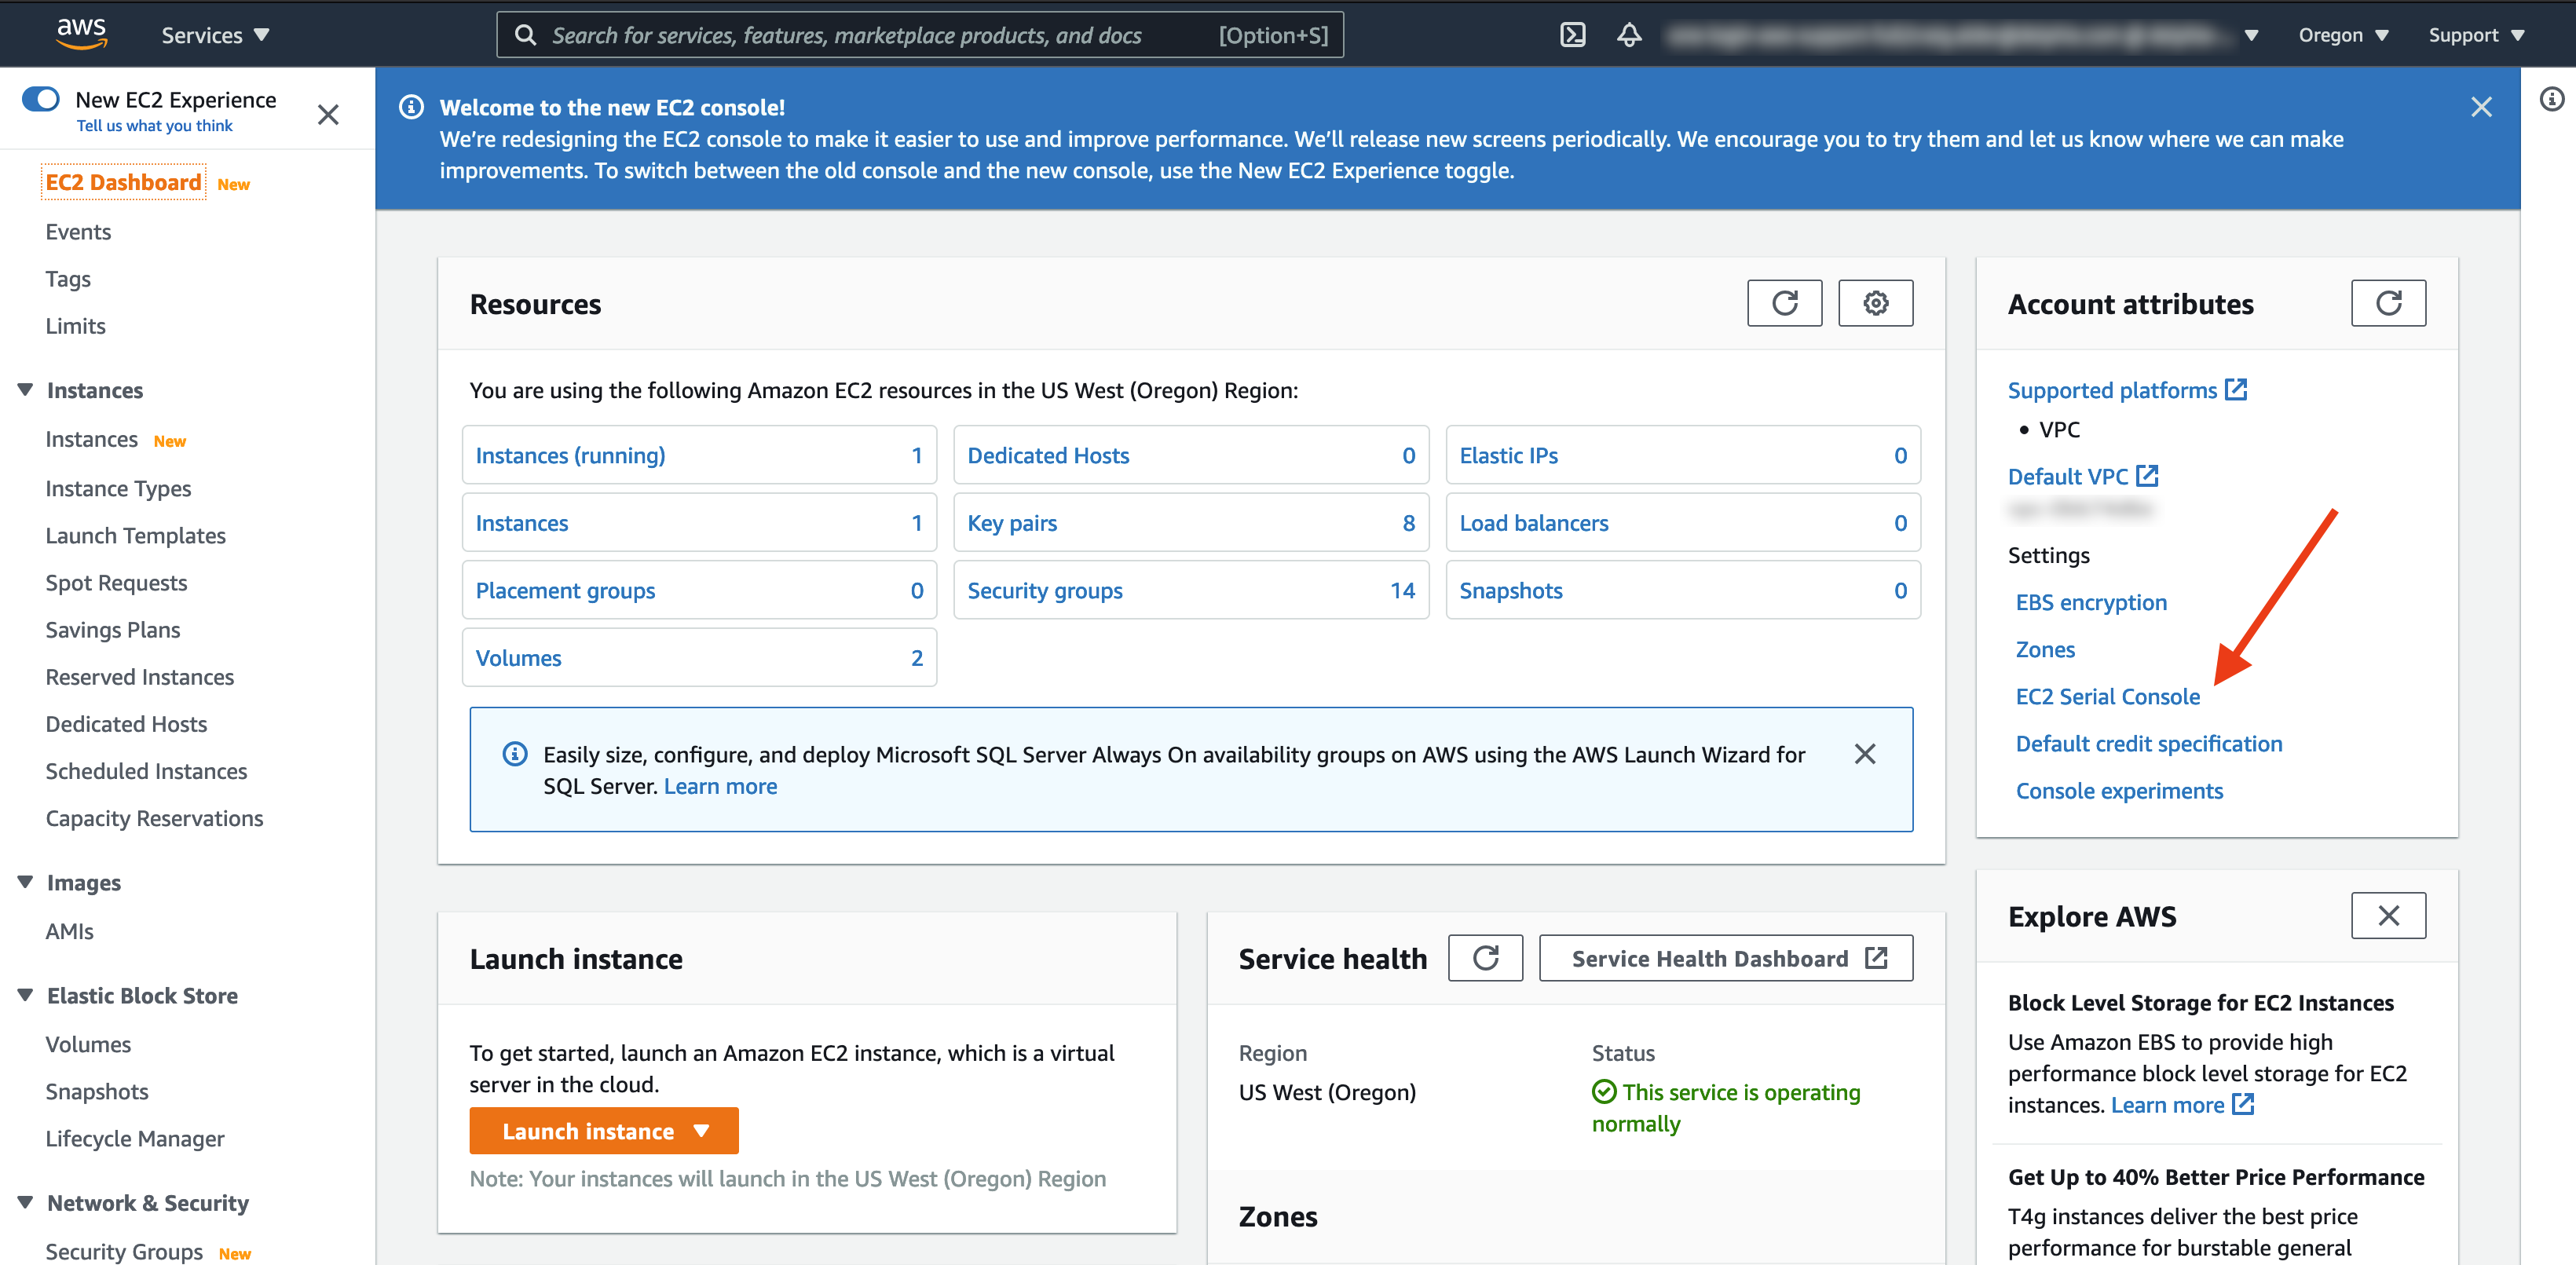
- From the EC2 Dashboard, click EC2 Serial Console under the Account Attributes section.
- Confirm that EC2 Serial Console access is allowed, as in the example below. If it is not, click Manage to enable it.

Clicking Manage on the previous page provides the option to enable console access.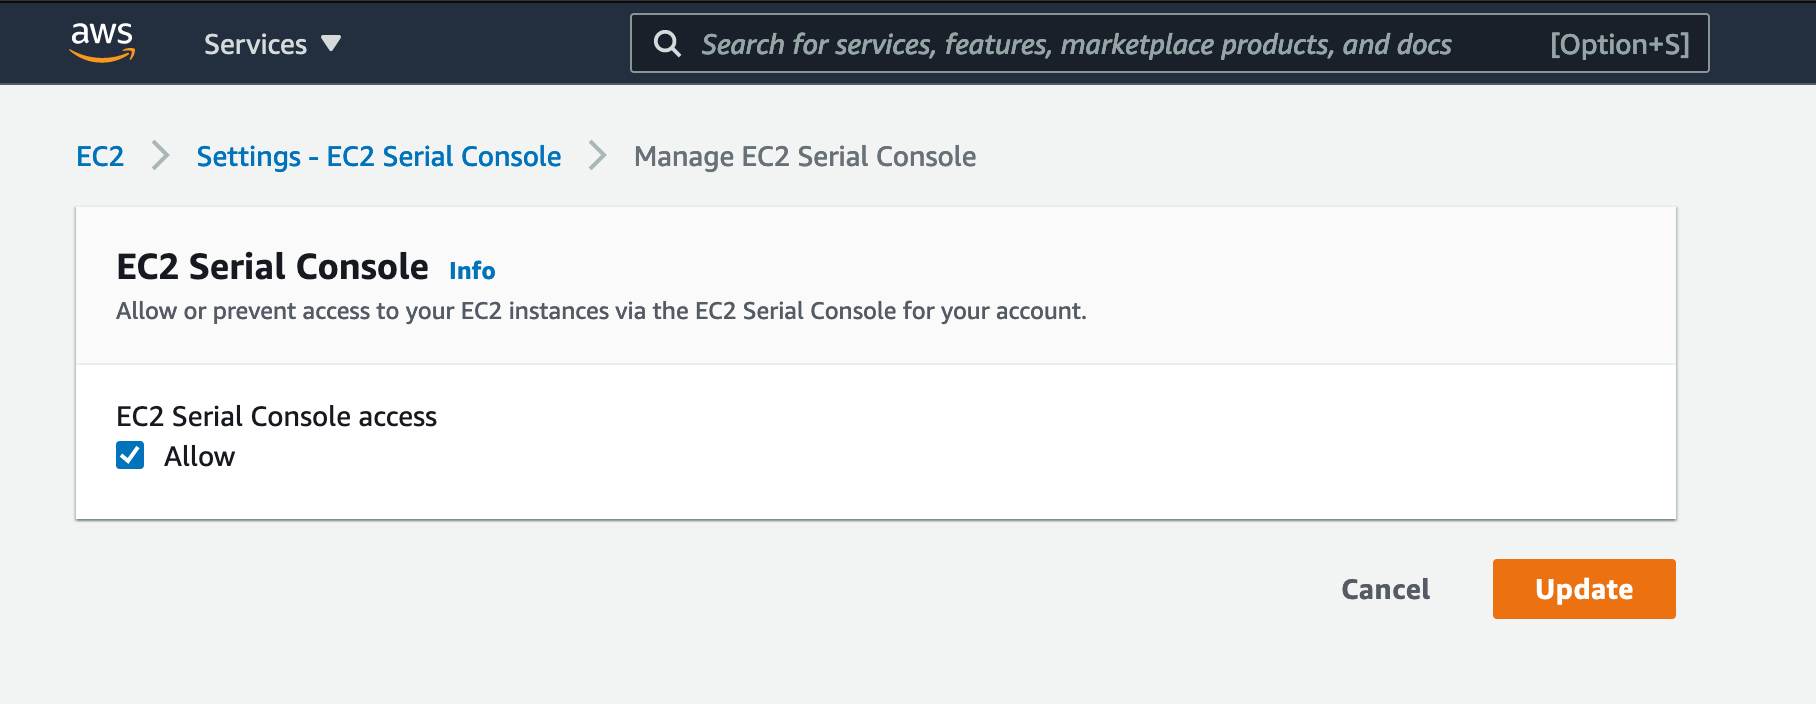
To Access the Serial Console
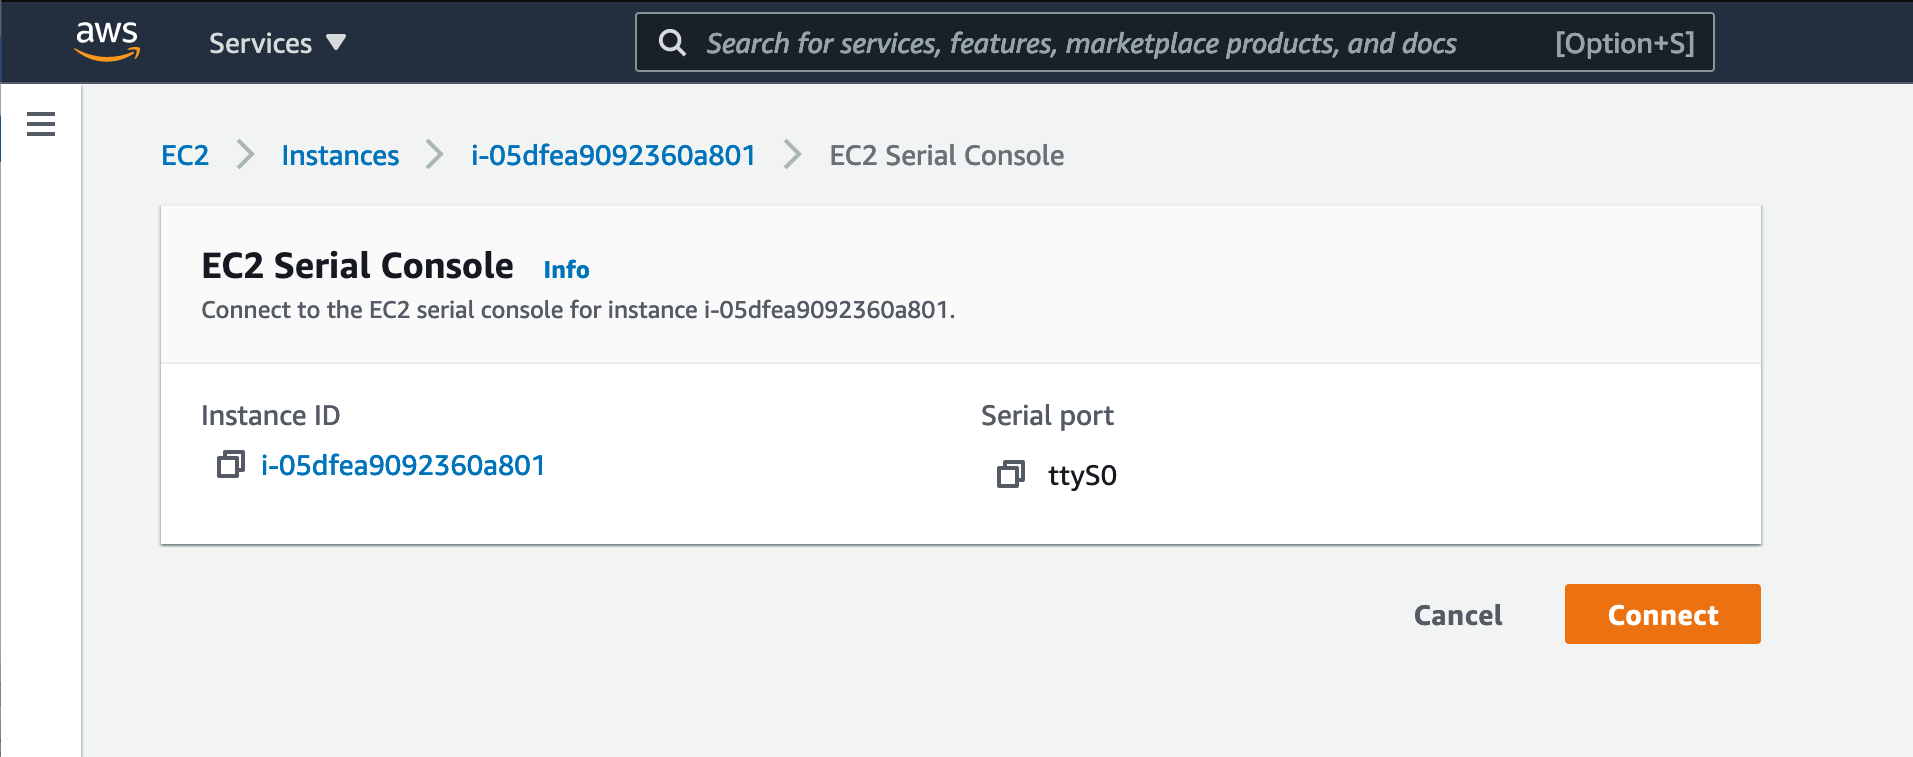
To access the serial console of a Delphix engine instance, select the VM instance in the EC2 Instances page. Next, click Actions → Monitor and troubleshoot → EC2 Serial Console.

- Click Connect on the EC2 Serial Console page to connect to the selected instance's serial console.
- A new page opens, showing the console for that instance.

- Press Enter to display a login prompt.

Related Articles
The following articles may provide more information or related information to this article:
- https://aws.amazon.com/blogs/aws/troubleshoot-boot-and-networking-issues-with-new-ec2-serial-console/
- https://aws.amazon.com/ec2/instance-types/
- https://docs.delphix.com/docs/deployment/deployment-for-aws-ec2