How to Migrate Algorithms, Domains(s), PROFILE_SET(s), PROFILE_EXPRESSION(s), and KEY to a Different Masking Engine Using the Masking API-Client (KBA5378)
KBA
KBA#
5378
Applicable Delphix Versions
- Click here to view the versions of the Delphix engine to which this article applies
-
Major Release
All Sub Releases
6.0 6.0.0.0, 6.0.1.0, 6.0.2.0 5.3 5.3.0.0, 5.3.0.1, 5.3.0.2, 5.3.0.3, 5.3.1.0, 5.3.1.1, 5.3.1.2, 5.3.2.0, 5.3.3.0, 5.3.3.1, 5.3.4.0, 5.3.5.0 5.3.6.0, 5.3.7.0, 5.3.7.1, 5.3.8.0, 5.3.8.1, 5.3.9.0
How to Task
The following procedure provides steps on how to migrate algorithms, domain(s), PROFILE_SET(s), PROFILE_EXPRESSION(s), and the KEY to a different masking engine using the Masking API-Client.
Prerequisites
The engine version must be 5.3 or higher for this procedure to work.
To complete the migration:
To migrate all algorithms and domains found on a masking engine, use the Syncing all Global Objects API found here Syncing all Global Objects.
If you want to migrate environments and masking jobs, please review:
https://maskingdocs.delphix.com/Connecting_Data/Managing_Environments/#exporting-an-environment
- Log in to the API-client and authorize the connection.
Please see: https://maskingdocs.delphix.com/Delphix_Masking_APIs/Masking_Client/Masking_API_Client/ - Navigate to
syncand expandGET /syncable-objects. - Set object_type to GLOBAL_OBJECT and press "Try it out!":
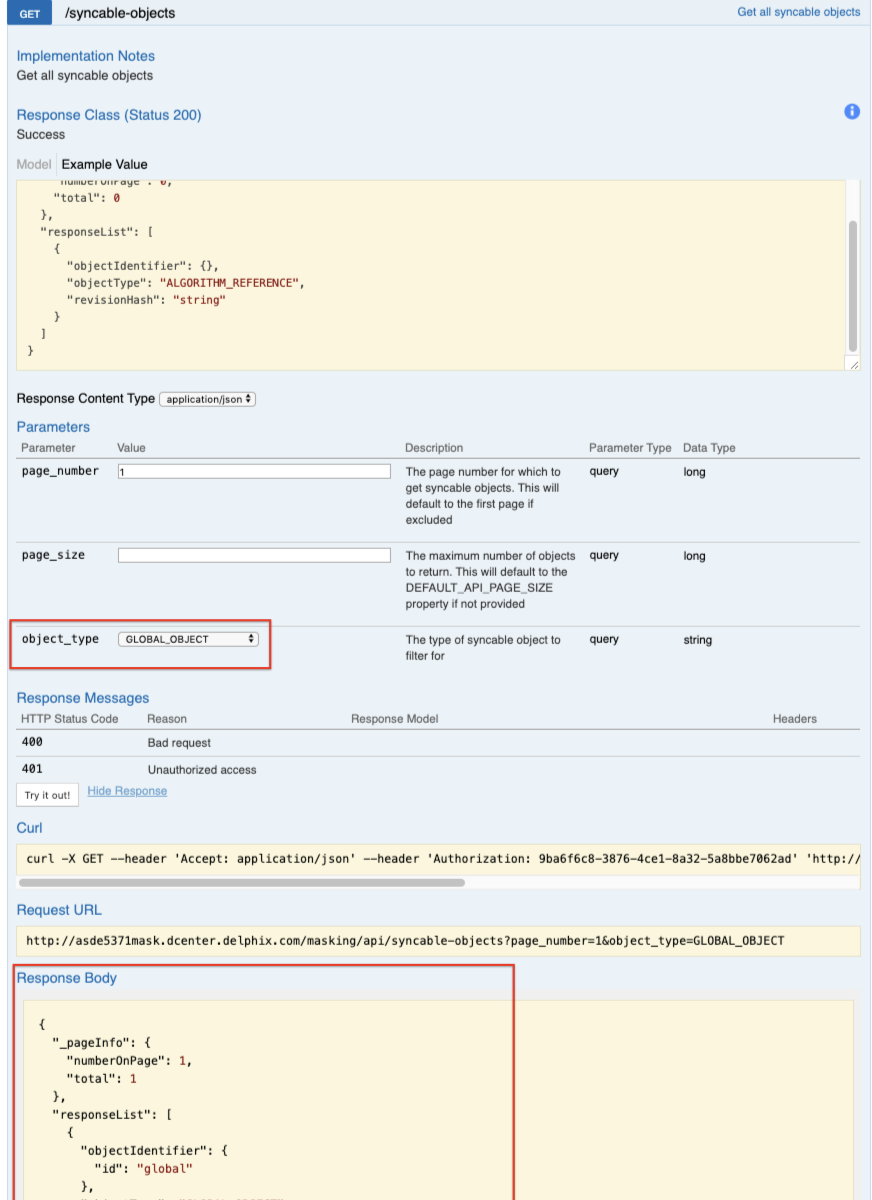
- Capture the following part of the response body:
[ { "objectIdentifier": { "id": "global" }, "objectType": "GLOBAL_OBJECT", "revisionHash": "25c3c4d45cb9da4e1fa51516bf2ee2f5d3d6b96f" } ] - Expand
POST /export-async, enter the response body, and press "Try it out":

This will begin generating a file on the masking engine that contains all of the algorithms and domains.
- In the Response Body, capture the export reference code (in the screenshot above it is
EXPORT-ZXhwb3J0X2RvY3VtZW50X1ppZHZVWW83Lmpzb24=).
The file generation can take several minutes depending on the number of algorithms and domains on the masking engine.
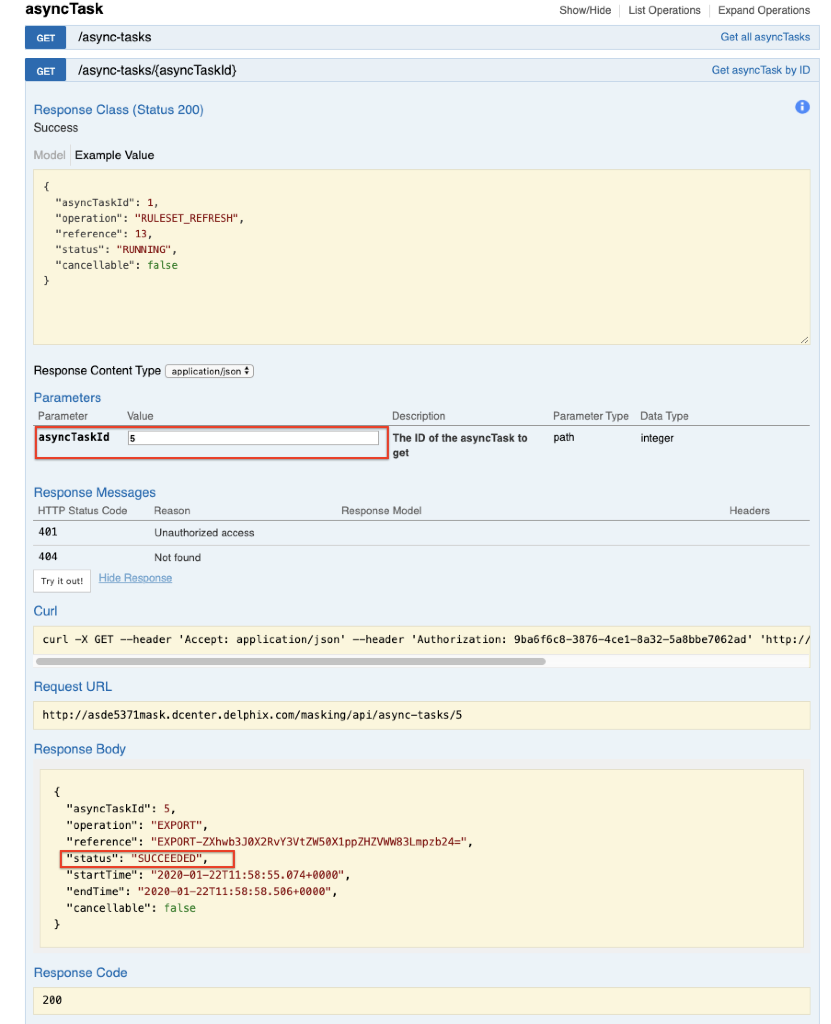
The process can be checked underasyncTask-GET /async-tasks/{asyncTaskId}. - Enter the asyncTaskId in the value section and press "Try it out!"
- Once the status is showing as SUCCEEDED the file is ready to be downloaded.
The file is downloaded from thefileDownloadsection usingGET /file-downloads/{fileDownloadId}. - Enter the EXPORT id code from earlier into the fileDownloadId section and press "Try it out!":
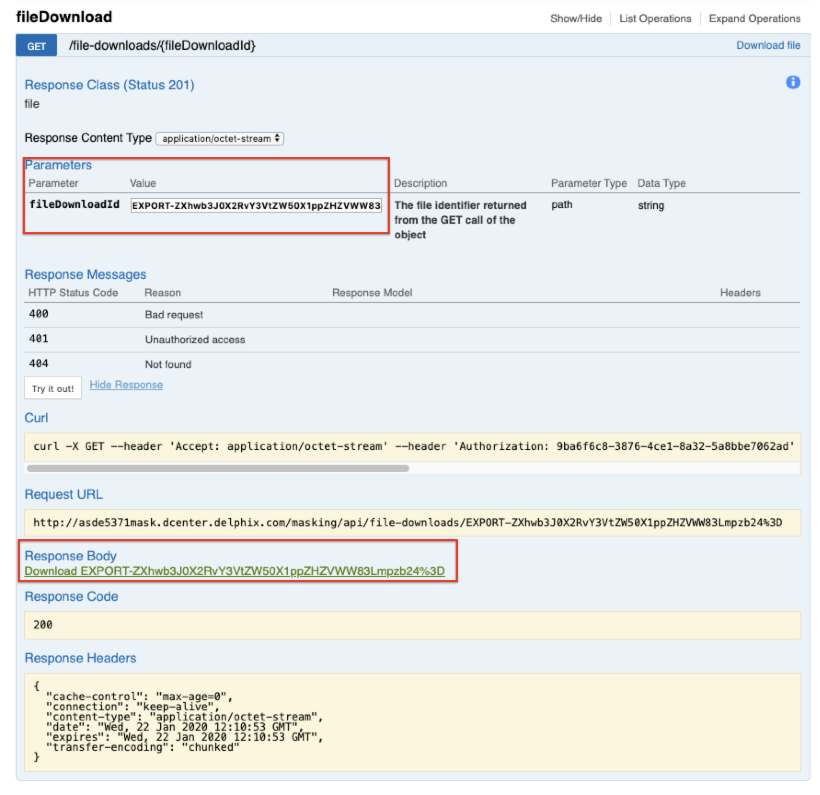
This will generate a download link for the file which can be downloaded to your computer.
This file can then be uploaded to the new engine. - On the new engine, login to the API-client and authorize the connection.
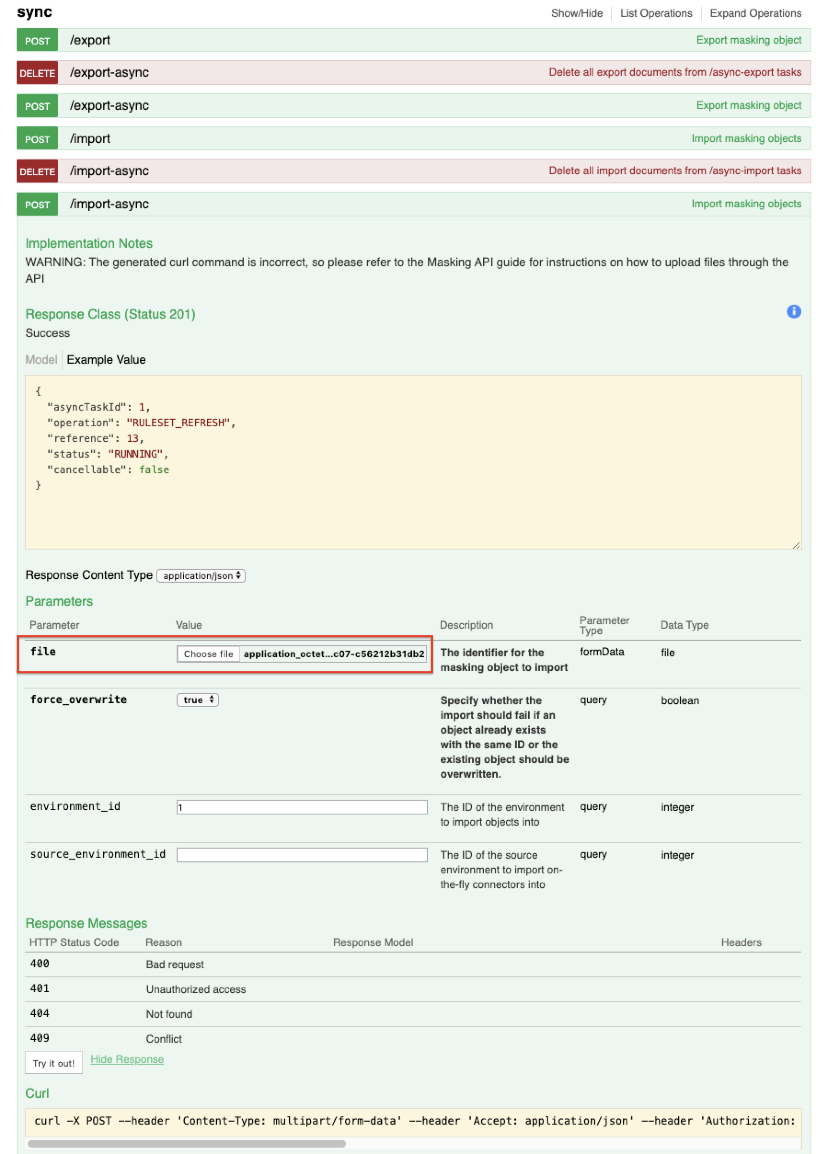
- After logging into the API-client, navigate to the
sync-POST /import-asyncsection. - Here the file that was downloaded from the old engine can be uploaded in the file section:
The upload can be checked under asyncTask, using the asyncTaskId. Once it shows SUCCEEDED the algorithms and domains will appear in the masking engine GUI.