Creating a File Masking CIFS/SMB Connection (KBA7488)
KBA
KBA# 7488Applicable Delphix Versions
- Click here to view the versions of the Delphix engine to which this article applies
-
Major Release All Sub Releases 6.0 6.0.0.0, 6.0.1.0, 6.0.1.1, 6.0.2.0, 6.0.2.1, 6.0.3.0, 6.0.3.1, 6.0.4.0, 6.0.4.1, 6.0.4.2, 6.0.5.0, 6.0.6.0, 6.0.6.1, 6.0.7.0, 6.0.8.0
How to Create a File Masking CIFS/SMB Connection
The aim of this knowledge article is to provide an example of setting up a Common Internet File System (CIFS) connection for file masking. This includes delimited, flat, and XML files.
Prerequisites
- A Delphix Masking Engine of Version 6 or higher.
- Port 445 open between the masking engine and the target server.
- Access to the Masking Engine API-Client (or API).
- An Administrator level user account.
To set up the CIFS connection
Complete the following procedure to create the CIFS connection.
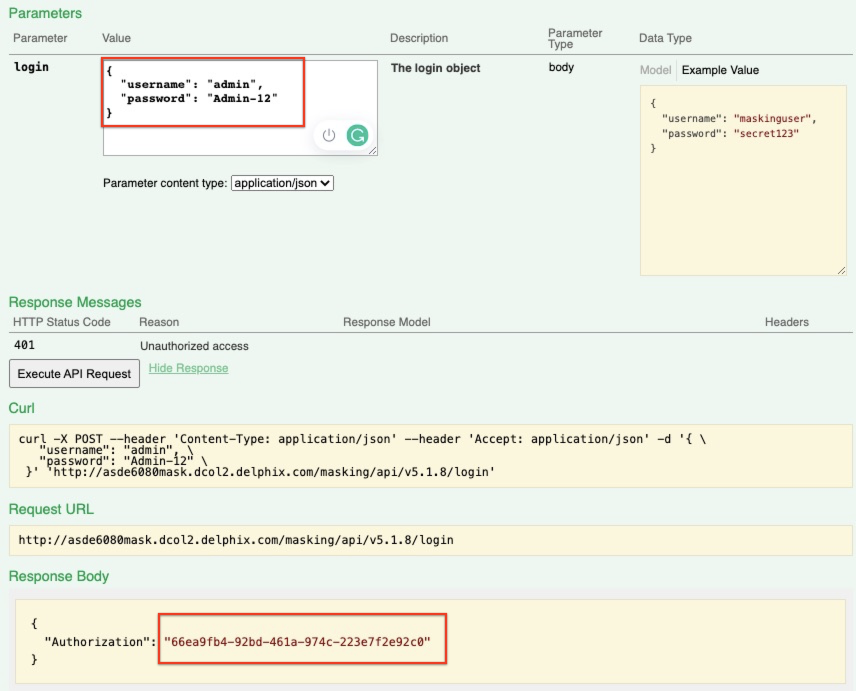
- Navigate and log in to the Masking engine API-client.
- The Masking API client can be accessed by adding 'API-Client' to the end of the masking engine URL:
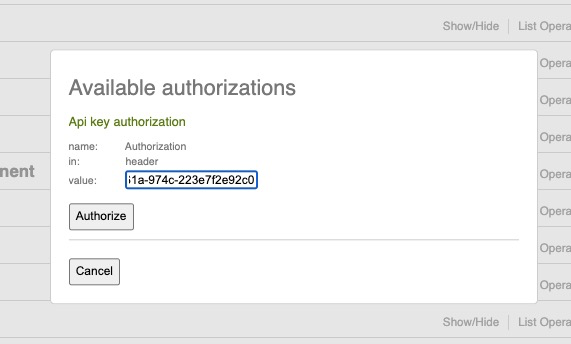
For example http://mymaskingengine.delphix.com/masking/api-client - Log in and authorize the API connection:
- The Masking API client can be accessed by adding 'API-Client' to the end of the masking engine URL:
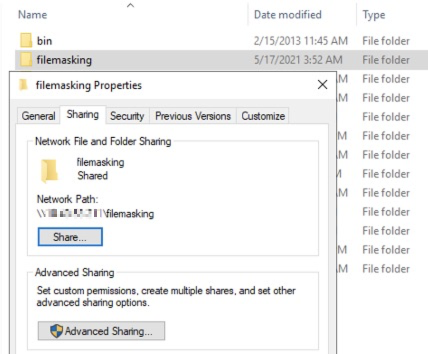
- Ensure the folder is being shared, Windows Example:
- Add the CIFS configuration to the mountFilesystem part of the API-Client.
Open the mountFilesystem section of the API client.
In the Body enter the required CIFS parameters Example:
{

    "mountName": "my_new_cifs_connection",

    "hostAddress": "WindowsHost.delphix.com",

    "mountPath": "/filemasking",

    "type": "CIFS",

    "connectOnStartup": true,

    "options": "username=delphix,password=delphix,domain=ad.domain.com,vers=3.0"

    }
Please note that the mountPath must be a slash / not a backslash \ when creating the connection.
Further mount options and information can be found in the documentation: https://maskingdocs.delphix.com/Connecting_Data/Managing_Remote_Mounts/
Screenshot:

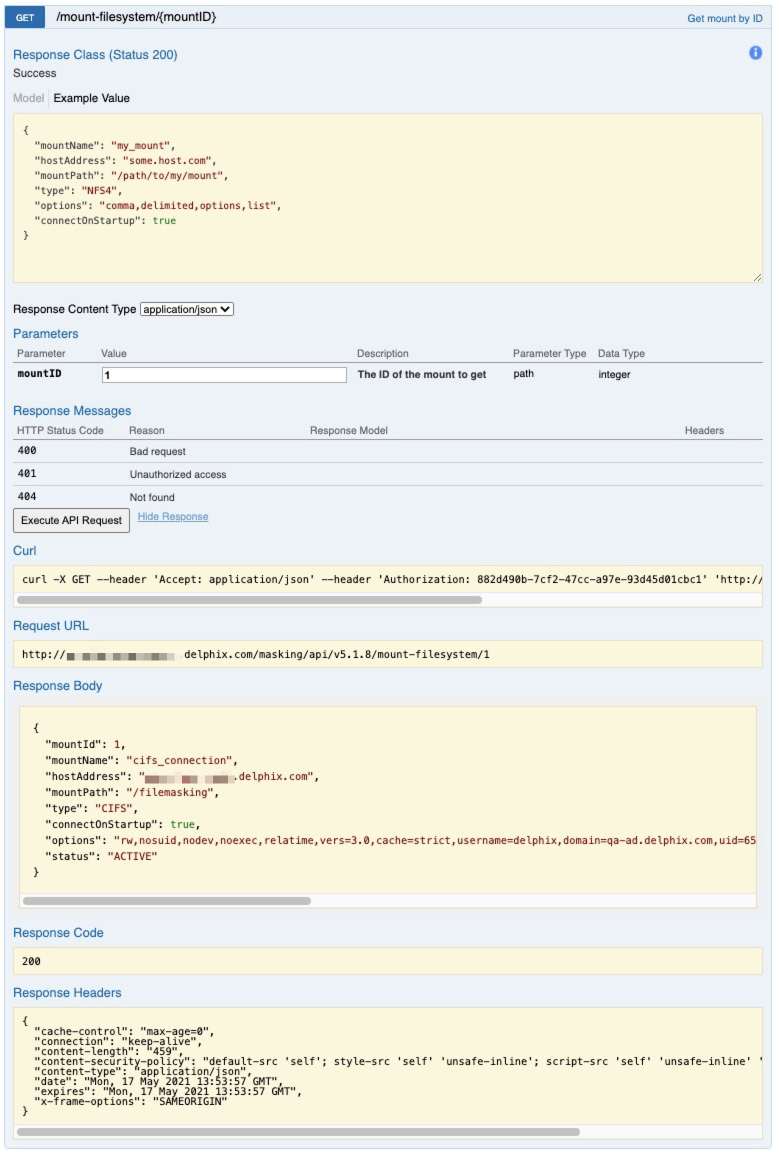
- You will need to know the mountID. Each time a new mountFilesystem is added, this value will increment by one. All of the available mounts can be listed in the GET /mount-filesystem section, this will show all the available mounts and the mountID value.
- You now need to Connect the masking engine to the CIFS share, this is again done through the API-Client. Enter the mountID value and Execute, this should now be connected.
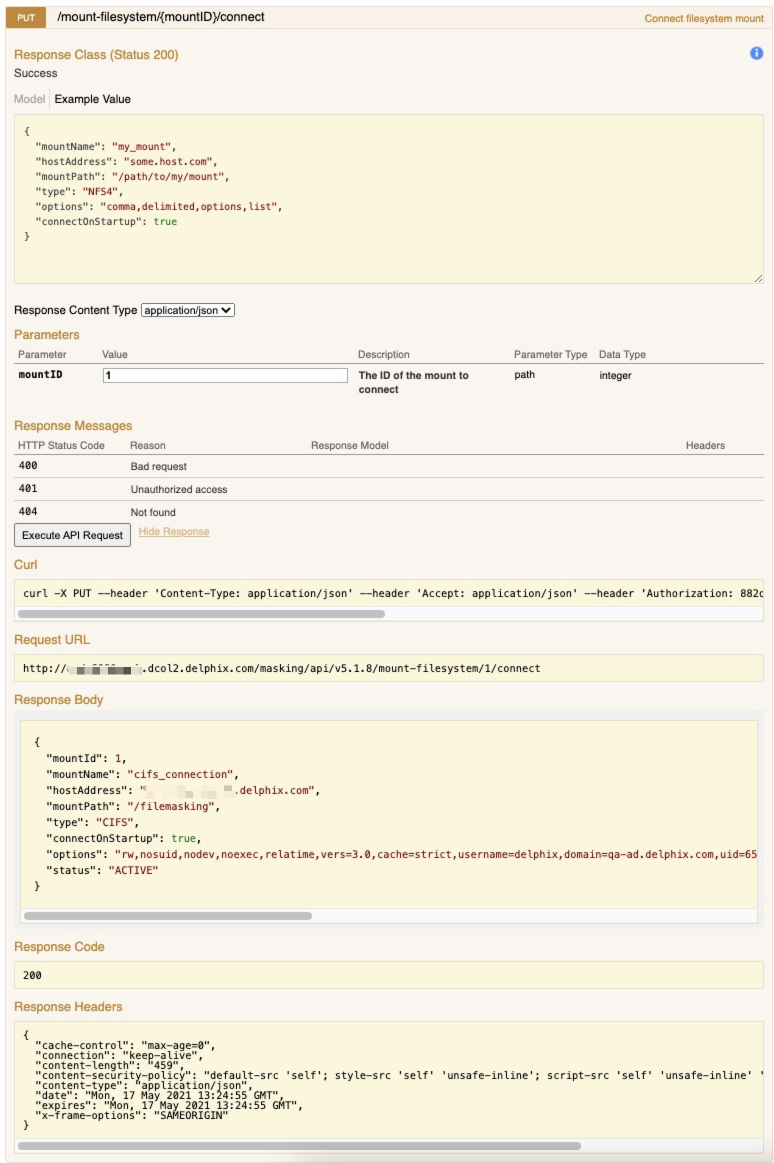
- The status of the connection can be checked by either the GET /mount-filesystem/ or GET /mount-filesystem/{mountID}
If everything is working, then 'ACTIVE' should be displayed.
Example:
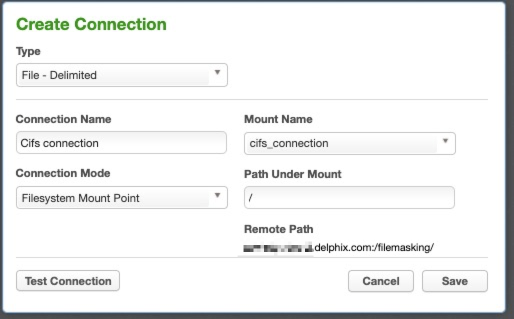
- The masking file connection can be created. Under the Mount Name the newly configured CIFS connection will be visible:
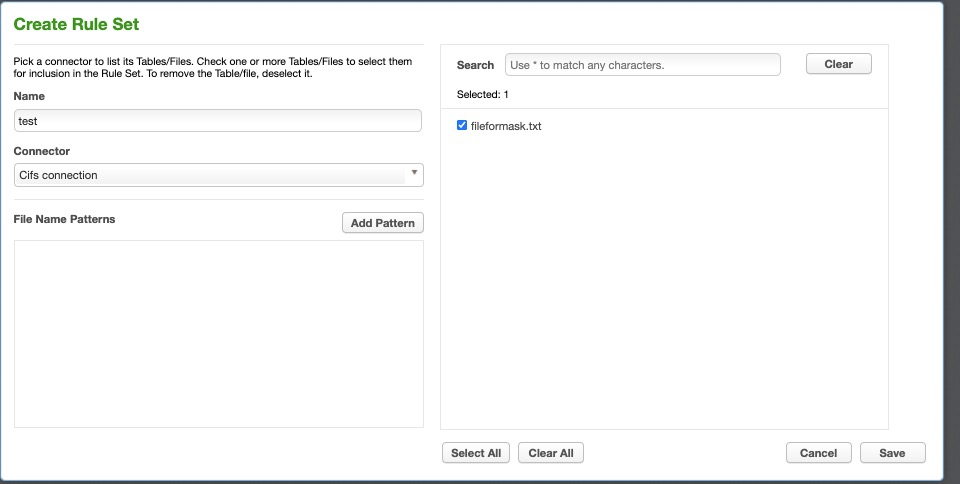
- The Rule Set can be created and should display all the files under the remote directory:
If any issues are encountered please either post on our community pages or reach out to Delphix support for assistance.
Related Articles
The following articles may provide more information or related information to this article:
- Masking Docs: Managing_Remote_Mounts
- Masking Docs: Masking_API_Client