Relinking a SQL Server dSource to a Higher SQL Server Instance Version (KBA7002)
KBA
KBA# 7002Applicable Delphix Versions
- Click here to view the versions of the Delphix engine to which this article applies
-
Major Release All Sub Releases 6.0 6.0.0.0, 6.0.1.0, 6.0.1.1, 6.0.2.0, 6.0.2.1, 6.0.3.0, 6.0.3.1, 6.0.4.0, 6.0.4.1, 6.0.4.2, 6.0.5.0, 6.0.6.0, 6.0.6.1, 6.0.7.0 5.3
5.3.0.0, 5.3.0.1, 5.3.0.2, 5.3.0.3, 5.3.1.0, 5.3.1.1, 5.3.1.2, 5.3.2.0, 5.3.3.0, 5.3.3.1, 5.3.4.0, 5.3.5.0 5.3.6.0, 5.3.7.0, 5.3.7.1, 5.3.8.0, 5.3.8.1, 5.3.9.0 5.2
5.2.2.0, 5.2.2.1, 5.2.3.0, 5.2.4.0, 5.2.5.0, 5.2.5.1, 5.2.6.0, 5.2.6.1
5.1
5.1.0.0, 5.1.1.0, 5.1.2.0, 5.1.3.0, 5.1.4.0, 5.1.5.0, 5.1.5.1, 5.1.6.0, 5.1.7.0, 5.1.8.0, 5.1.8.1, 5.1.9.0, 5.1.10.0
5.0
5.0.1.0, 5.0.1.1, 5.0.2.0, 5.0.2.1, 5.0.2.2, 5.0.2.3, 5.0.3.0, 5.0.3.1, 5.0.4.0, 5.0.4.1 ,5.0.5.0, 5.0.5.1, 5.0.5.2, 5.0.5.3, 5.0.5.4
How to relink a SQL Server dSource to a higher SQL Server version
It is not uncommon to restore a database from an older SQL Server instance version to a newer version. If this occurs to a dSource, this article will provide the steps to accomplish this task successfully.
- The scenario covers the case where a source database SQL Server instance is to be decommissioned and the source database will be restored to a newer SQL Server instance version on the same or different host. This specific situation is not an in-place upgrade, but a migration from an older SQL Server instance version to a newer SQL Server instance version.
- In this example, the original source database, ipa, runs on SQL Server 2016 on a Windows 2016 server host. It will be migrated to SQL Server 2017 on a Windows 2019 server host.
- The steps to accomplish this will cover the restore to the new SQL Server instance and the unlink and relink steps on the Delphix engine.
Prerequisites
- For this demonstration, both SQL Server source environments are already discovered on the Delphix engine.
- However, the new database needs to be discovered on the SQL Server 2017 environment, which will require an environment refresh.
- For the purposes of demonstration, a Full backup is required from the original source database and the newer SQL Server will need to have access to this FULL backup for the restore before the old environment is decommissioned.
- In a real life situation, this process is governed by the individual sites per policies regarding the backup and restoring of SQL Server databases.
To Unlink from the Old SQL Server and Relink to the New SQL Server
Follow these steps to perform the unlink/relink of the SQL Server dSource. Steps include the restore of the source database to a newer SQL Server, unlinking the dSource from the UI, and then relinking it to the new environment with higher SQL Server version.
Restoring the New Database
This is a simple example just for demonstration purposes. Company policies dictate how to create the backups and how to perform the restoration to a different database with the same structure. The purpose here is to demonstrate how the SQL Server instance will update the database via "upgrade steps". Also, you can create a "seed" database with same structure as the old source, then restore it with the original source backup, or you can simply run the RESTORE command to create and restore the new database. Either way, after this is accomplished you must discover or refresh the new source environment so the new database is recognized by the Delphix engine.
- First, create a FULL backup of the old database.
When restoring to the newer SQL Server instance, collect the filelist as it will be used to build the restore command:
-- Use this command to grab the Logical Names of the database and log
RESTORE FILELISTONLY FROM DISK = N'\\10-43-88-94\backups\2016\ipa_full_20210202_1457.bak'
Results as seen from the SQL Server Management Studio (SSMS) display of the executed query:

- Use the LogicalName for the RESTORE command. This restore replaces the database contents and performs the recovery.
-- Build the restore command
RESTORE DATABASE [ipa] FROM DISK = N'\\10-43-88-94\backups\2016\ipa_full_20210202_1457.bak'
WITH REPLACE, RECOVERY,
  MOVE 'ipa' TO 'C:\Program Files\Microsoft SQL Server\MSSQL14.SQL2017\MSSQL\DATA\ipa.mdf',
  MOVE 'ipa_log' TO 'C:\Program Files\Microsoft SQL Server\MSSQL14.SQL2017\MSSQL\DATA\ipa_log.ldf'
GO
The results include the upgrade steps involved:
Processed 400 pages for database 'ipa', file 'ipa' on file 1.
Processed 2 pages for database 'ipa', file 'ipa_log' on file 1.
Converting database 'ipa' from version 852 to the current version 869.
Database 'ipa' running the upgrade step from version 852 to version 853.
Database 'ipa' running the upgrade step from version 853 to version 854.
Database 'ipa' running the upgrade step from version 854 to version 855.
Database 'ipa' running the upgrade step from version 855 to version 856.
Database 'ipa' running the upgrade step from version 856 to version 857.
Database 'ipa' running the upgrade step from version 857 to version 858.
Database 'ipa' running the upgrade step from version 858 to version 859.
Database 'ipa' running the upgrade step from version 859 to version 860.
Database 'ipa' running the upgrade step from version 860 to version 861.
Database 'ipa' running the upgrade step from version 861 to version 862.
Database 'ipa' running the upgrade step from version 862 to version 863.
Database 'ipa' running the upgrade step from version 863 to version 864.
Database 'ipa' running the upgrade step from version 864 to version 865.
Database 'ipa' running the upgrade step from version 865 to version 866.
Database 'ipa' running the upgrade step from version 866 to version 867.
Database 'ipa' running the upgrade step from version 867 to version 868.
Database 'ipa' running the upgrade step from version 868 to version 869.
RESTORE DATABASE successfully processed 402 pages in 0.336 seconds (9.325 MB/sec).
The restore operation includes the data and log processing, as well as the upgrade steps to bring the older 2016 database to the 2017 SQL Server level.
You are ready to continue with the dSource activities.
Unlinking the dSource from the Old SQL Server
Unlinking a dSource simply disassociates and disconnects the dSource from the source environment. It will also remove the staging database associated with the dSource from the staging (PPT = preProvisioning Target) environment. To determine the name of the staging database, in the UI look at the staging environment and under the Databases tab scroll to the instance the staging database is running on (typically this is the connector host of the source environment) and look for the long alphanumeric string named database with the source database name in parenthesis:
- 564dc311-0d9b-21cb-3682-e020616764cc-staging-85 (dSource: porter)
- 564dc311-0d9b-21cb-3682-e020616764cc-staging-102 (dSource: ipa)
CLI Method
Login to the Delphix engine from an ssh session as an admin user and run the commands as follows. In this case, the source database name is "ipa":
pv6050.dcol1> database
pv6050.dcol1 database> select ipa
pv6050.dcol1 database 'ipa'> detachSource
pv6050.dcol1 database 'ipa' detachSource *> ls
Properties
    type: DetachSourceParameters
    source: (*)  <--- REQUIRED

pv6050.dcol1 database 'ipa' detachSource *> set source=ipa
pv6050.dcol1 database 'ipa' detachSource *> ls
Properties
    type: DetachSourceParameters
    source: ipa (*)

pv6050.dcol1 database 'ipa' detachSource *> commit
    Dispatched job JOB-967
    DB_DETACH_SOURCE job started for "mssql/ipa".
    Starting disable of staging source "564dc311-0d9b-21cb-3682-e020616764cc-staging-102".
    Starting deletion for linked source "ipa".
    Starting deletion of staging database "564dc311-0d9b-21cb-3682-e020616764cc-staging-102".
    Staging database "564dc311-0d9b-21cb-3682-e020616764cc-staging-102" dropped successfully.
    Unmounting datasets on the staging host "pvw2k16t.dcol1.delphix.com".
    dSource "ipa" successfully deleted.
    DB_DETACH_SOURCE job for "mssql/ipa" completed successfully.
GUI Method
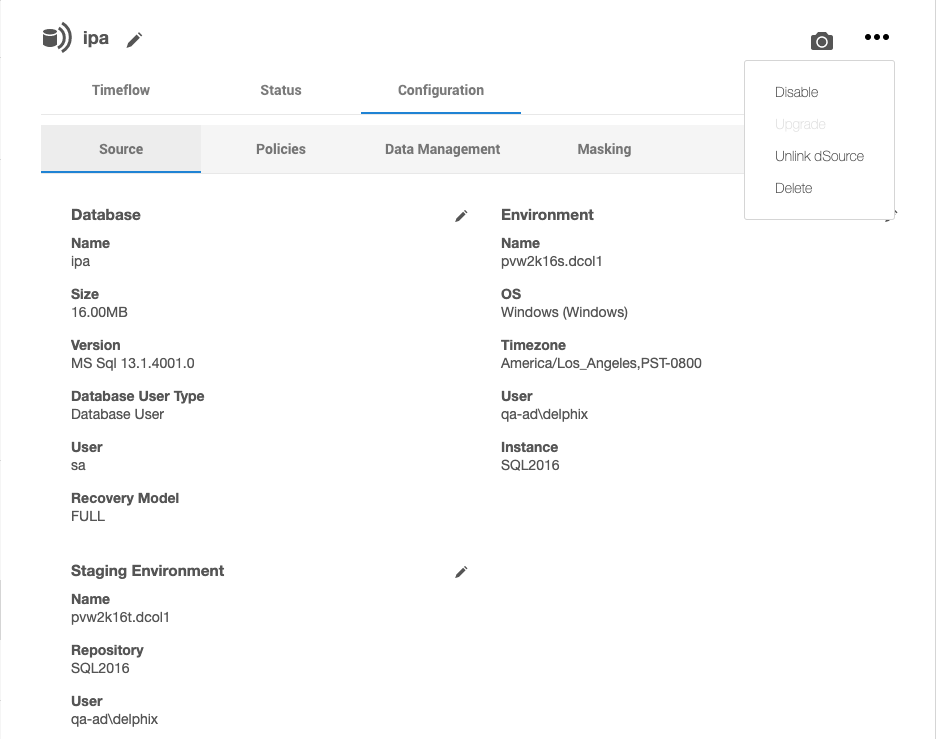
- In the GUI, from the dSource page, select "Unlink dSource" from the action ellipsis:
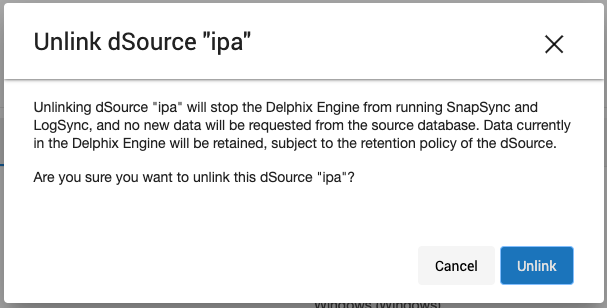
- Read the customary warning about what unlinking will do and its request for confirmation:
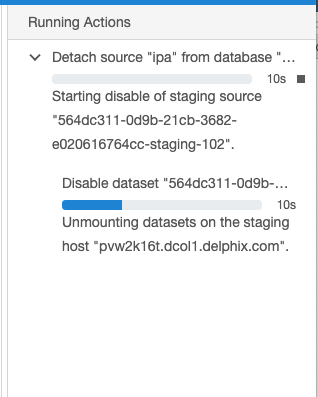
- Monitor the Unlink activities from the "Running Actions" pane. Events such as unmounting and disable are displayed; all operations that will dismantle the staging database from this SQL Server staging instance and environment:
And, when complete, the dSource is in a "Detached" state:

In this unlinked state, VDBs can still be provisioned from the existing snapshots of the dSource. Snapsync (DB_SYNC) will not be allowed since there is no staging database associated to the dSource.
Relinking the dSource to the New SQL Server - the Migration
Relinking the dSource associates it to a source environment. It will create a staging database and mount the database files contained in the Delphix storage.
You will be required to provide, at a minimum, from the GUI relink, the source and staging environment and instance, the database user, and the database name.
Starting with version 6.0.2.0, you are not just limited to the SQL Server database user for the mssqlUser. You can use database user, environment user, or domain user. This allows you to leverage the same user and set of credentials, eliminating the database user requirement. The documentation describing this feature is Windows Authentication for SQL Server.
CLI Method
- Login to the Delphix engine from an ssh session as an admin user and run the commands as follows. In this case, the source database name is "ipa". First, select the "ipa" database and in the attachSource operation the first thing to do is set the attachData.type:
pv6050.dcol1 database 'ipa'> ls
Properties
    type: MSSqlDatabaseContainer
    name: ipa
    creationTime: 2021-02-04T18:24:28.852Z
    currentTimeflow: ipa/MSSql-Timeflow-1
    description:
    group: mssql
    masked: false
    os: Windows
    performanceMode: DISABLED
    processor: x86
    reference: MSSQL_DB_CONTAINER-102
    runtime:
        type: MSSqlDBContainerRuntime
        lastRestoredBackupSetUUID: 6084780B-6412-4A2F-BE8E-B87CC1ACA97F
        logSyncActive: false
    sourcingPolicy:
        type: SourcingPolicy
        logsyncEnabled: false
    transformation: false


Operations
delete
update
refresh
rollback
undo
switchTimeflow
sync
detachSource
attachSource
connectionInfo
purgeLogs
addLiveSource
removeLiveSource
startLiveSourceResync
discardLiveSourceResync
applyLiveSourceResync
timeflowSnapshotDayRange
pv6050.dcol1 database 'ipa'> attachSource
pv6050.dcol1 database 'ipa' attachSource *> set attachData.type=MSSqlAttachData
- Set the config, ingestion strategy and type, type of user and password, backup file location, and staging environment. Here the setting is broken up into sections to explain various aspect.
The attachData.config is a string that can include source environment, source instance name, and the database name. You can list all the config items with tab completion. Tab completion does not work for attachData.ingestionStrategy.type. Enter any, or an empty, value and a listing of valid values will display and the setting can be corrected.
pv6050.dcol1 database 'ipa' attachSource *> set attachData.config=
....
pv2k19s.dcol1/SQL2017/ipa                         pv2k19s.dcol1/SQL2017/porter                      pvw12r2lss.dcol1/SQL2008R2/Delphix_Admin
pvw12r2lss.dcol1/SQL2012/Delphix_Admin            pvw12r2lss.dcol1/SQL2014ENT/Delphix_Admin         pvw12r2lss.dcol1/SQL2014STD/Delphix_Admin
pvw12r2lss.dcol1/SQL2016/Delphix_Admin            pvw12r2lss.dcol1/SQL2016/ipa                      pvw12r2lst.dcol1/SQL2008R2/Delphix_Admin
...
pv6050.dcol1 database 'ipa' attachSource *> set attachData.config=pv2k19s.dcol1/SQL2017/ipa
pv6050.dcol1 database 'ipa' attachSource *> set attachData.ingestionStrategy.type=TRANSACTION_LOG
Value must be one of: [ 'DelphixManagedBackupIngestionStrategy', 'ExternalBackupIngestionStrategy', 'NoBackupIngestionStrategy' ].
pv6050.dcol1 database 'ipa' attachSource *> set attachData.ingestionStrategy.type=ExternalBackupIngestionStrategy
For attachData.ingestionStrategy.validatedSyncMode, known as validated sync, tab completion does work:
pv6050.dcol1 database 'ipa' attachSource *> set attachData.ingestionStrategy.validatedSyncMode=
FULL                  FULL_OR_DIFFERENTIAL  TRANSACTION_LOG

pv6050.dcol1 database 'ipa' attachSource *> set attachData.ingestionStrategy.validatedSyncMode=TRANSACTION_LOG
Running the ls (list) command will display the attributes, with required items clearly indicated:
pv6050.dcol1 database 'ipa' attachSource *> ls
Properties
    type: AttachSourceParameters
    attachData:
        type: MSSqlAttachData (*)
        backupLocationCredentials: (unset)
        backupLocationUser: (unset)
        config: pvw2k16s.dcol1/SQL2016/ipa (*)
        encryptionKey: (unset)
        externalFilePath: (unset)
        ingestionStrategy:
            type: ExternalBackupIngestionStrategy (*)
            validatedSyncMode: TRANSACTION_LOG (*)
        mssqlCommvaultConfig: (unset)
        mssqlNetbackupConfig: (unset)
        mssqlUser:
            type: MSSqlDatabaseUser (*)
            password:
                type: PasswordCredential (*)
                password: (required)
            user: (required)
        operations: (unset)
        pptHostUser: (unset)
        pptRepository: (required)
        sharedBackupLocations: (required)
        sourceHostUser: (unset)
        stagingPostScript: (unset)
        stagingPreScript: (unset)
- Set the required items. Starting with 6.0.2.0 version, you are not just limited to the SQL Server database user for the attachData.mssqlUser. Other choices are offered, but be sure you are properly configured to use the selected user type.
- Select the attachData.pptRepository for the staging database and the attachData.sharedBackupLocations for where the sync operation will look for backup files to sync:
pv6050.dcol1 database 'ipa' attachSource *> set attachData.mssqlUser.type=
Value must be one of: [ 'MSSqlDatabaseUser', 'MSSqlDomainUser', 'MSSqlEnvironmentUser' ].
pv6050.dcol1 database 'ipa' attachSource *> set attachData.mssqlUser.type=MSSqlDatabaseUser
pv6050.dcol1 database 'ipa' attachSource *> set attachData.mssqlUser.user=sa
pv6050.dcol1 database 'ipa' attachSource *> set attachData.mssqlUser.password.password=**********
pv6050.dcol1 database 'ipa' attachSource *> set attachData.pptRepository=pvw2k19t.dcol1/SQL2017
pv6050.dcol1 database 'ipa' attachSource *> set attachData.sharedBackupLocations=\\10-43-66-207\SQLBackups\ipa
pv6050.dcol1 database 'ipa' attachSource *>
- If you are using the Autodiscover backup path for the attachData.sharedBackupLocations, simply set with an empty string:
pv6050.dcol1 database 'ipa' attachSource *> set attachData.sharedBackupLocations=
pv6050.dcol1 database 'ipa' attachSource *> ls
Properties
    type: AttachSourceParameters
    attachData:
        type: MSSqlAttachData (*)
        ...
        sharedBackupLocations: (empty) (*)
        ...
- At this point you are ready to commit the operation to link to the new environment and instance. Suppose the source and staging environment were incompatible. Maybe by mistake the source environment was left at the original one:
pv6050.dcol1 database 'ipa' attachSource *> set attachData.config=pvw2k16s.dcol1/SQL2016/ipa
- On the commit, a message will display to indicate why the job did not execute:
pv6050.dcol1 database 'ipa' attachSource *> commit
   Error: Selected SQL Server instance "SQL2017" on staging host "pvw2k19t.dcol1.delphix.com" is not compatible with the source database "ipa".
  Action: Select an instance that is the same SQL Server version as that of the source database and try again.
pv6050.dcol1 database 'ipa' attachSource *>
- When all values are set properly, it is time to commit the attachSource job:
pv6050.dcol1 database 'ipa' attachSource *> ls
Properties
    type: AttachSourceParameters
    attachData:
        type: MSSqlAttachData (*)
        backupLocationCredentials: (unset)
        backupLocationUser: (unset)
        config: pv2k19s.dcol1/SQL2017/ipa (*)
        encryptionKey: (unset)
        externalFilePath: (unset)
        ingestionStrategy:
            type: ExternalBackupIngestionStrategy (*)
            validatedSyncMode: TRANSACTION_LOG (*)
        mssqlCommvaultConfig: (unset)
        mssqlNetbackupConfig: (unset)
        mssqlUser:
            type: MSSqlDatabaseUser (*)
            password:
                type: PasswordCredential (*)
                password: ******** (*)
            user: sa (*)
        operations: (unset)
        pptHostUser: (unset)
        pptRepository: pvw2k19t.dcol1/SQL2017 (*)
        sharedBackupLocations: \\10-43-66-207\SQLBackups\ipa (*)
        sourceHostUser: (unset)
        stagingPostScript: (unset)
        stagingPreScript: (unset)
pv6050.dcol1 database 'ipa' attachSource *> commit
    ipa
    Dispatched job JOB-1084
    DB_ATTACH_SOURCE job started for "mssql/ipa".
    Enabling staging source "564dc311-0d9b-21cb-3682-e020616764cc-staging-102".
    Mounting datasets on the staging host "pvw2k19t.dcol1.delphix.com".
    Attaching staging database on staging host.
    Staging source enabled.
    DB_ATTACH_SOURCE job for "mssql/ipa" completed successfully.
pv6050.dcol1 database 'ipa'>
- After the job is complete, list the properties again to check parameters. If there is something that requires changing, use the CLI, API, or GUI to make the change. When listing, you need to check the database, source, and sourceconfig actions from the top level. At this point, it is a great idea to list all three and copy the results and save for documentation purposes.
Example - the database level after the attachSource (DB_ATTACH_SOURCE) job completes:
pv6050.dcol1 database 'ipa'> ls
Properties
    type: MSSqlDatabaseContainer
    name: ipa
    creationTime: 2021-02-04T18:24:28.852Z
    currentTimeflow: ipa/MSSql-Timeflow-1
    description:
    group: mssql
    masked: false
    os: Windows
    performanceMode: DISABLED
    processor: x86
    reference: MSSQL_DB_CONTAINER-102
    runtime:
        type: MSSqlDBContainerRuntime
        lastRestoredBackupSetUUID: 6084780B-6412-4A2F-BE8E-B87CC1ACA97F
        logSyncActive: false
        preProvisioningStatus:
            type: PreProvisioningRuntime
            lastUpdateTimestamp: 2021-02-16T00:13:08.516Z
            preProvisioningState: ACTIVE
            status: The most recent source database backup has already been applied.
    sourcingPolicy:
        type: SourcingPolicy
        logsyncEnabled: false
    transformation: false


Operations
delete
update
refresh
rollback
undo
switchTimeflow
sync
detachSource
attachSource
connectionInfo
purgeLogs
addLiveSource
removeLiveSource
startLiveSourceResync
discardLiveSourceResync
applyLiveSourceResync
timeflowSnapshotDayRange
pv6050.dcol1 database 'ipa'>
GUI Method
The GUI method is not as complicated as the CLI method and as such, after attach, some properties may require changing from the dSource in the GUI to complete the job.
- Select the dSource to relink and select the "Link dSource" option from the action ellipsis (upper right-hand corner):

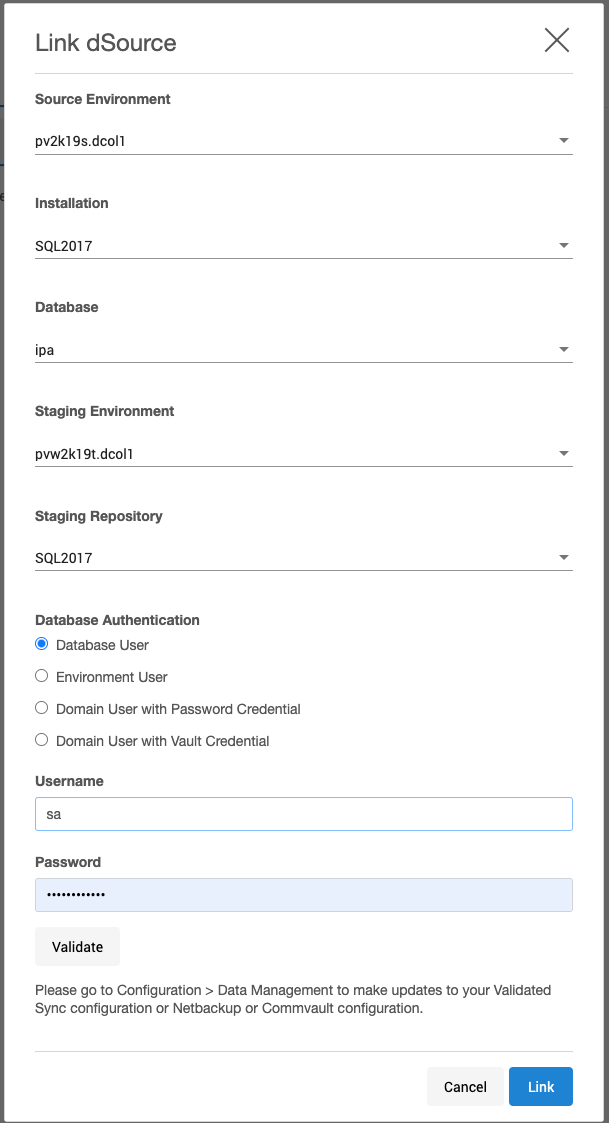
- Provide the properties on the Link dSource dialog. Notice the message at the bottom reminding the user to go to the configuration panel to complete validated sync and/or third party backup configurations:
If all looks correct, click the "Link" button and the job will start.
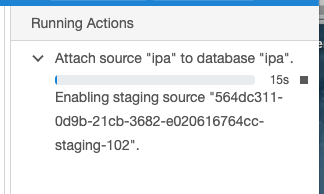
- Monitor the job events from the "Running Actions" section in the upper right-hand side of the GUI:
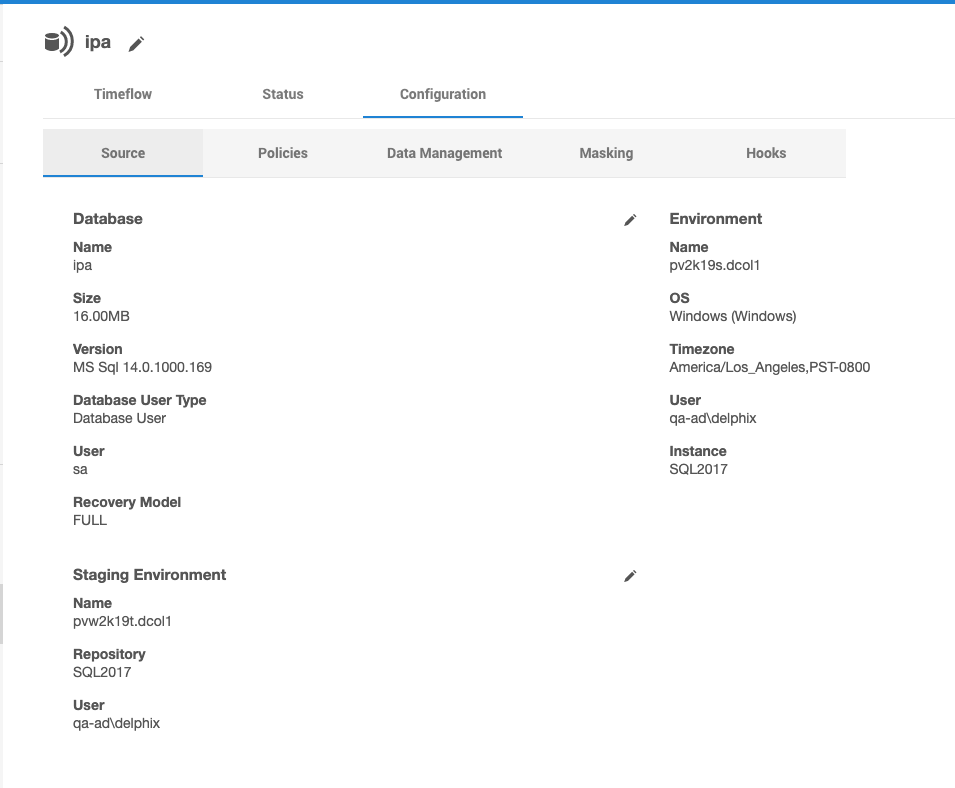
- Check the Configuration -> Source and Configuration -> Data Management tabs to confirm your properties.
Here is the example of the Configuration -> Source tab:
Conclusion
- Migration is useful when there are dynamic environments, and also comes in handy if there is an issue on one environment and a migration can help out, whether it is a resource issue or something else.
- The process can be automated to a degree with the use of scripts using the API or dxtoolkit. Knowledge of the various components required for the migration will make the process efficient.
Related Articles
The following articles may provide more information or related information to this article: